Installing carpet on stairs upgrades home safety by preventing residents from slipping. Stair carpets add warmth, reduce echoes, and provide a stylish yet personalized look. Carpeting on stairs absorbs high-traffic foot noises, especially in a multi-story building. They add comfort through cushioning, provide lumbar support, and ease your walk.
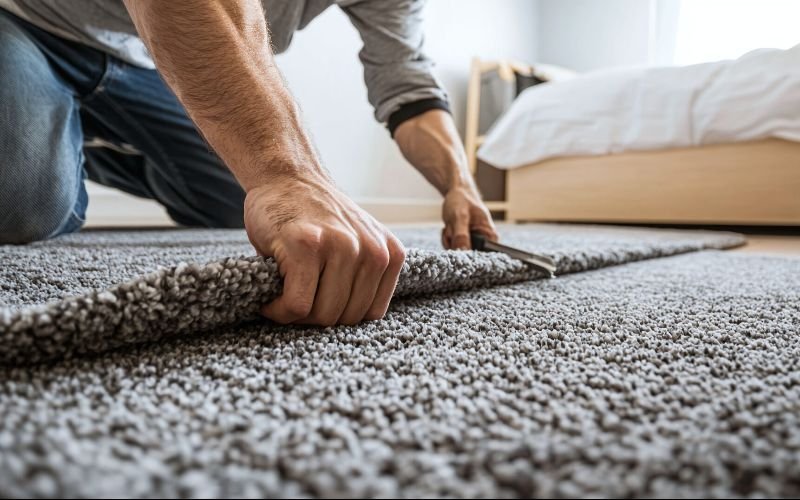
Stair carpet protects the surface from daily wear and tear and prevents dents and scratches as well. After knowing all the perks, you might be wondering how to install carpet on stairs. A manageable way to break it down by base preparation, padding, and seaming. Here is the detailed and step-by-step carpet installation guide.
Tools & Materials You’ll Need
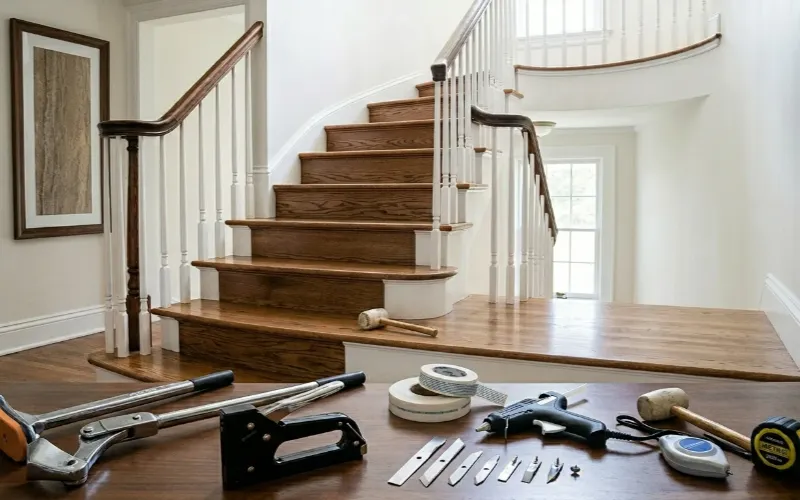
For noisy, uneven, and slippery staircases, carpeting works best. To install them properly, here are the Tools needed to install carpet on stairs.
Essential Tools
- Knee Kicker
- Tucker
- Utility Carpet Knife
- Tackless Strips
- Electric Staple Gun
- Hammer Stapler
- Padding
Material Required
- Underlay or Padding
- Tack Strips
- Carpet or Runner
- Staples
- Seam Sealer
- Concrete Nails
- Seam Tape
Best Ways to Install Stair Carpets
Among the versatile stair carpet installation methods, the best choice depends on the carpet material and stair types. Commercial stairs require complex, expensive carpet options, such as the cap-and-band method. Residential staircases’ carpets are fitted using the waterfall method.
Waterfall Method
This method ensures the carpet flows smoothly over the stair tread down to the next riser. It creates natural flow and aesthetic visuals. They are quick and easy to install and work best with patterned carpets. For casual home look and DIY installation, the waterfall method is considered best, especially for beginners.
Cap And Band Method
Commercial buildings with complex stair shapes require carpet fitting using the cap-and-band method. In this method, single carpet pieces are trimmed and applied by wrapping the tread and riser to give a tighter fit. It gives staircases a polished, clean look and reduces walking noise. For a high-traffic commercial building, it suits well and provides a premium look.
How To Measure Stairs For Carpet
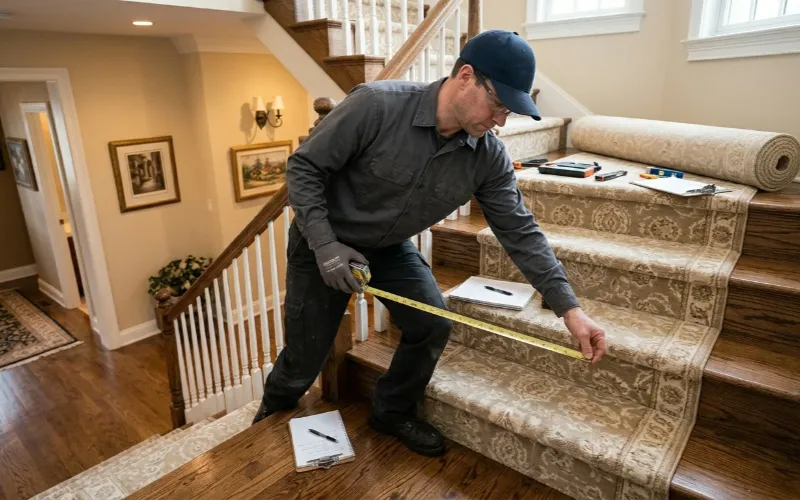
To begin, you need to calculate the total length of the carpet along with the width and depth. Separately, measure the height of the riser, adding 2 inches for waste during cutting. Make sure to measure the tread and riser with a tape measure. After that, measure the height and the overhang of the stairs.
To add depth in tread and riser height, keep 5cm extra. Now, multiply the dimensions by the total number of steps of stairs. For fitting and trimming, add 5cm to 10cm to the total dimensions. After that, measure half-landings and winders and add 10 cm to the length and width, keeping trimming in mind.
Preparing Your Stairs Before Installation
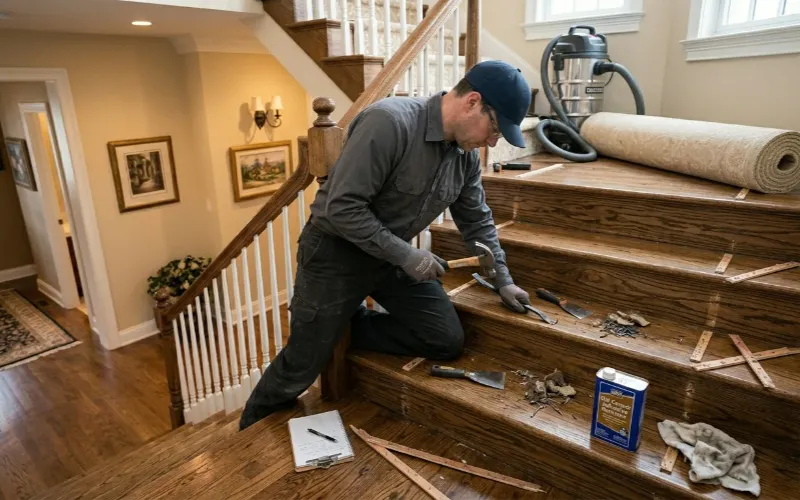
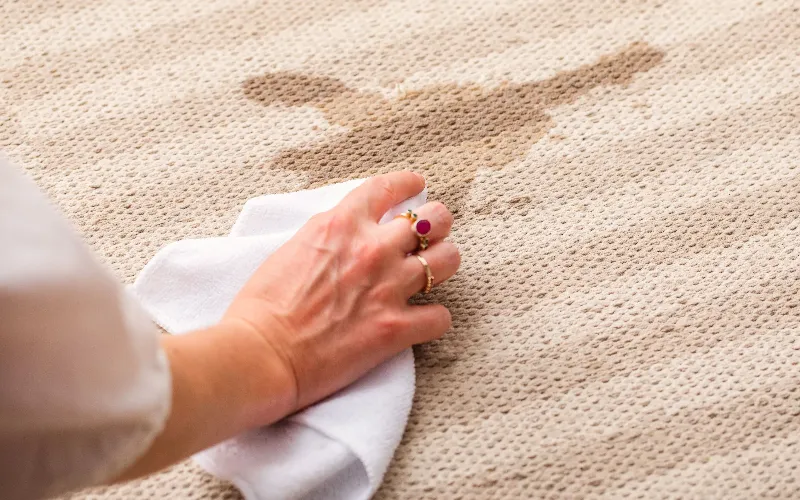
Stair carpet installation requires detailed preparation before you begin. For efficient results, prepare the stairs for carpet installation by properly removing the old carpet and underlay. Right after that, vacuum the surface dirt and debris using a vacuum cleaner or broom. Use wood filler or cover cracks and holes. You can also use sand to revive the riser and tread using 60- to 80-grit sand. Make sure the stairs are completely dry before starting the work. As moisture on the stairs ruins adhesion.
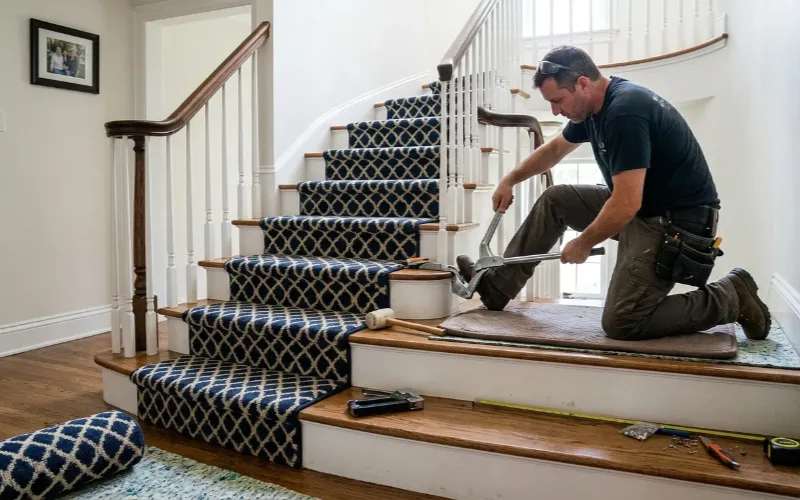
Step-by-Step Guide To Installing Carpet On Stairs
Do you need an installation for commercial or residential stair carpets? We have provided a DIY carpet stair installation process for your ease. From base preparation to installation and finishing, everything is streamlined in this guide.
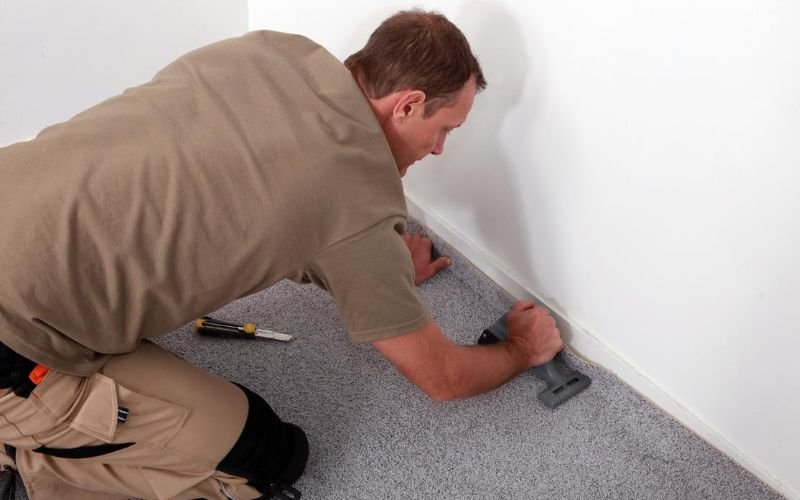
Step 1: Install Tack Strips
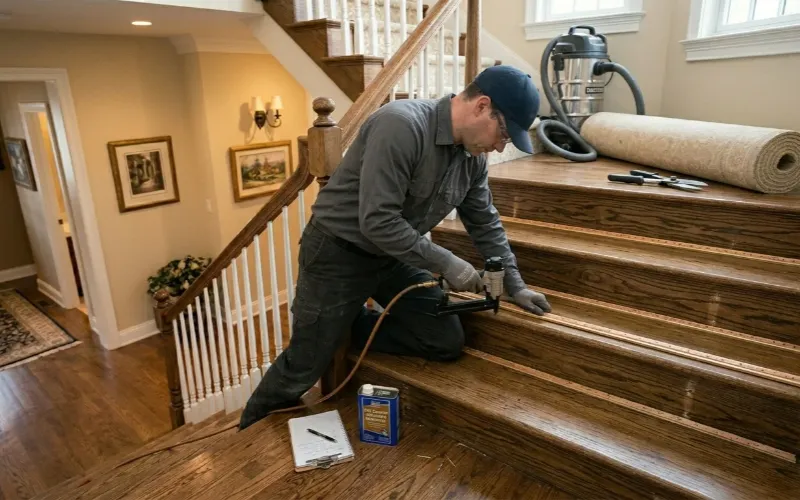
After measuring the stair carpets, secure them. Carpet securing requires tack strips fitted into the stairs to prevent slipping. Remove dust and clean the subfloor using a vacuum cleaner and mop. Remove the old strips from the floor. Take a precise wall measurement, use a snip or saw to cut to the accurate size. Place a strip with a gap of ¼ to ½, making sure tacks are angled towards the wall. Using a hammer, fit nails into the wooden subfloor. Prefer a masonry hammer to secure concrete nails. Lastly, use a strong adhesive to ensure a secure grip on the carpet.
Step 2: Add Carpet Padding
Carpet padding is an important step in installing stair carpet. It gives ultimate comfort, insulation, and a safer walk. After cleaning the floor and removing old padding, measure the stairs. Cut the padding to an exact size for the riser and runner. Place padding over the tread to fit it against the back tack strip.
Take a heavy-duty stapler and hammer tacker and secure the pad from the back. Remove the edge padding and secure it from there. Trim the excess material along the tack strip using a utility knife. Make sure the pad is smooth and does not overlap.
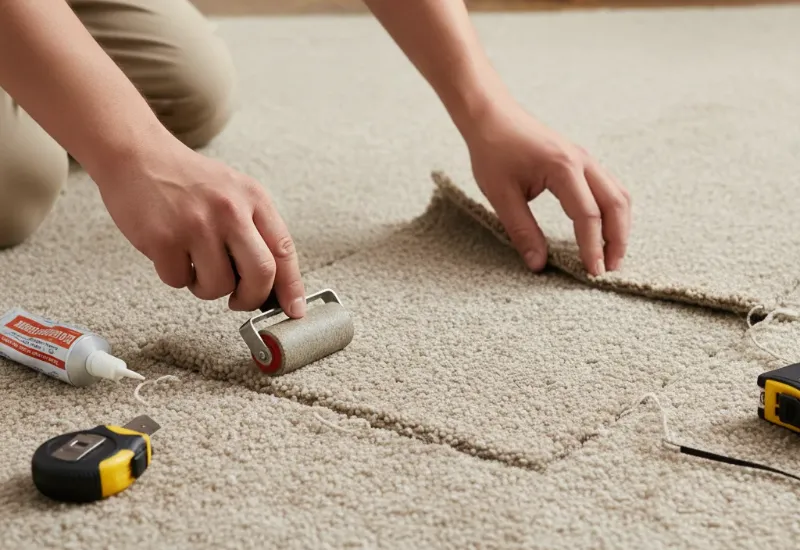
Step 3: Cut Carpet To Size
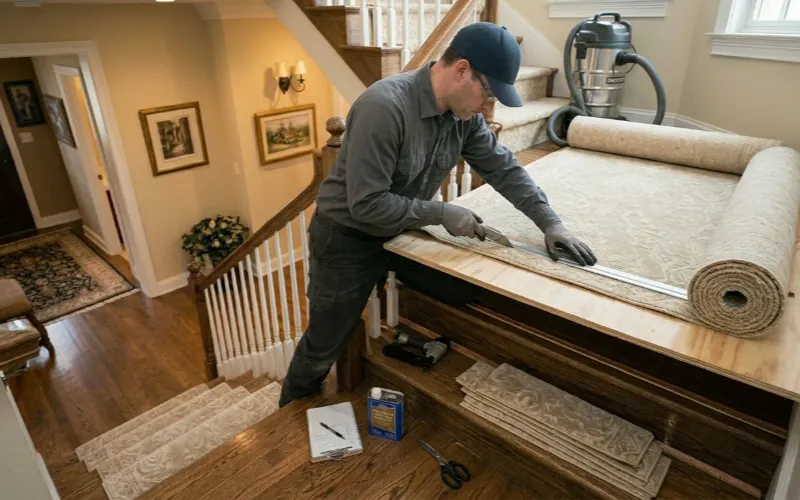
Before carpet cutting, take a closer look at the carpet measurement. Never make the mistake of assuming all stairs are identical. Use the stair dimensions that you have calculated earlier. It is important to cut the carpet into measured lengths and widths according to the riser and tread. Cutting the carpet with a utility knife or carpet cutter helps prevent uneven edges. Make sure to leave a few centimeters behind when trimming. These extra materials are sealed with adhesives and protect the corners from dust accumulation.
Step 4: Attach Carpet To Bottom Step
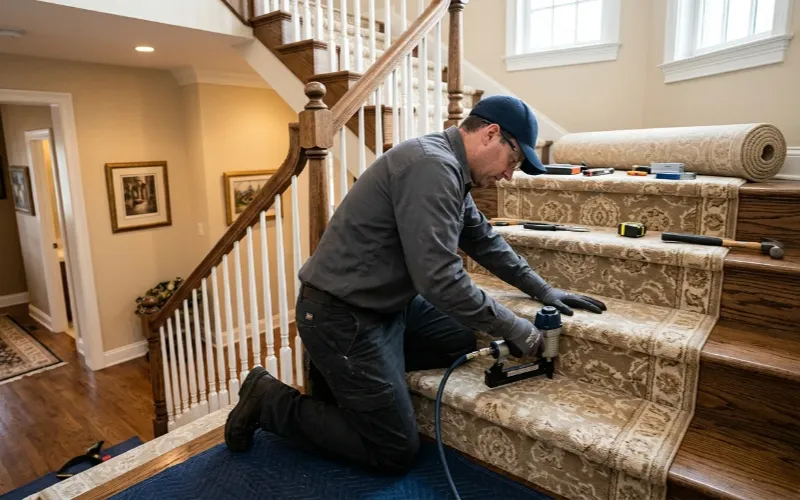
Fixing the carpet at the riser is a very crucial yet careful task during installation. Start by fitting the grippers on the tread and riser. Fix them using pins facing the corners of both. Tickle the edges of the carpet at the bottom of the first riser. Staple the carpet at the bottom edge. Using a strong adhesive, fix the carpet with accuracy.
Step 5: Stretch Carpet Using Knee Kicker
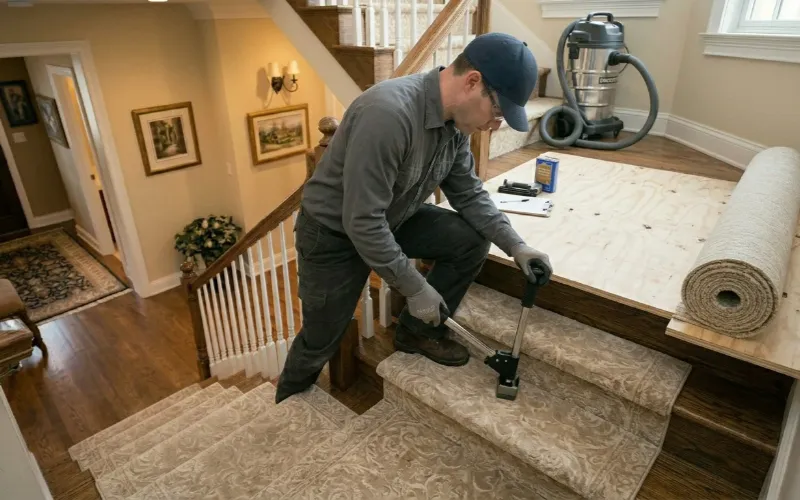
During carpet fitting on stairs, stretching is the main element. It makes carpets wrinkle-free and seamless without disturbing the appearance of staircases. To begin the process, use a knee kicker, place its head at least 6 to 8 inches away from the riser. Angle the knee kicker in the direction that you want the carpet to be in. After that, use the upper leg to strike the padded end and stretch the carpet towards the back of the thread. Make sure to prolong the grip for a long time period.
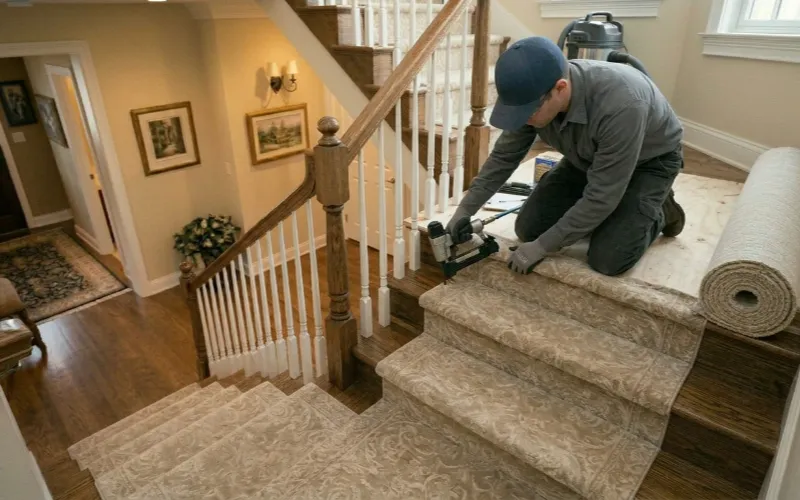
Step 6: Secure Carpet With Accuracy
Securing the carpet is a basic and foremost part of stair carpet installation. For the process, start from the first riser of the stairs. Take a bolster chisel and press the corner of the carpet. Remove the carpet creases between the riser and tread. Through this technique, carpet can fit perfectly and does not move away from its original place. While securing, see where the riser meets the tread, and secure that area of carpet using a staple gun.
Step 7: Finish The Top Step
After securing the carpet, recheck all the stairs for loose threads. If you find excess carpet corners, trim them immediately. For loose threads, secure them using adhesives and trimming. Make a test walk on the stairs and check for any displacement.
Wrapping Up
Carpet installation is vital to get an anti-slip walk, especially on stairs. Properly installed stair carpet adds comfort and safety in your home and office. For a precise stair carpet installation, the right measurement, subfloor preparation, and precise fitting give the best results. Fitting the tack strips before carpet placement gives precise results.
Stretch the carpet using a knee kicker and secure it with nails to prevent carpet accumulation. This beginner’s guide has already described the whole carpet installation process on stairs. You can take a closer look at the steps to achieve a perfect fit using the DIY method at home.