Carpet patching is the right way to revive your carpet’s look. Minor damages and burnt sections can significantly alter the overall appearance of your carpet. Furthermore, if your carpet becomes faded or burnt, consider using a carpet patching method. In this method, you have to cut out the damaged piece of carpet and replace it with an almost identical patch.
Besides, professional repair requires a lot of money. While in the case of Dubai, homeowners cannot afford such expenses. Thus, you need to use this DIY carpet patching guide from Installation Squad to revive your carpet’s appearance. So, look at the smart guide below to get a reasonable carpet patch at home with minimal effort.
DIY Step-by-Step Carpet Patching Guide
Patching is a highly cost-effective way to repair damaged carpets. With minor repairs and replacements, you can get stain-free carpet within budget. Besides, it can save you costs regarding a new carpet purchase. So, if your carpet gets damaged and stained, then worry not, because here is the step-by-step guide for carpet patching.
Required Tools
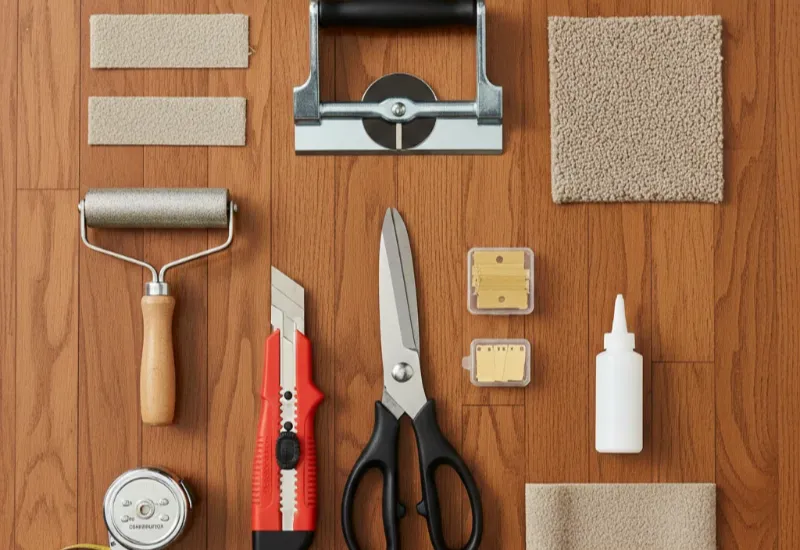
The following tools are required for repairing the damaged carpet. Collect them before starting the patching work.
- Towel
- Star Roller
- Vaccum Cleaner
- Strong Adhesives
- Tape Measurer
- Marker
- Carpet Cutter
Necessary Material
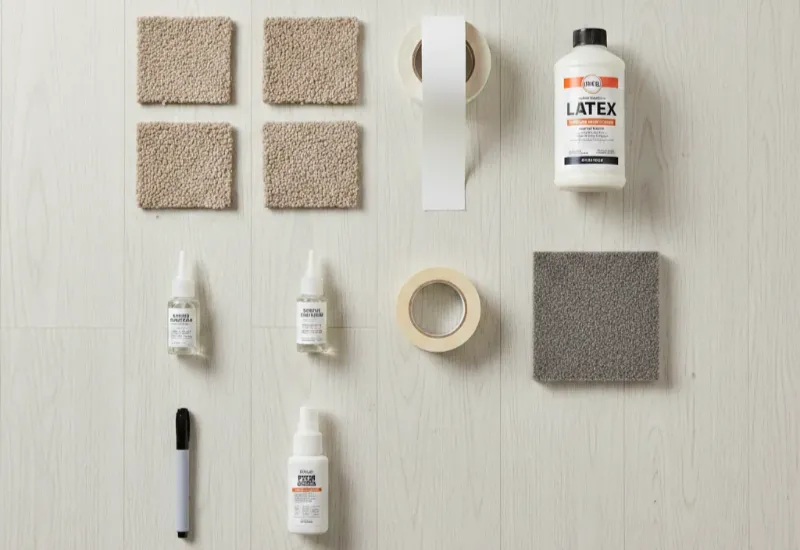
Carpet patches are fixed using strong adhesives and sealants. Thus, here is the list of strong sealants.
- Heat-activated Tape
- Seam Sealer
- Adhesive Disk
- Pressure-sensitive adhesive
Analyze The Carpet Condition
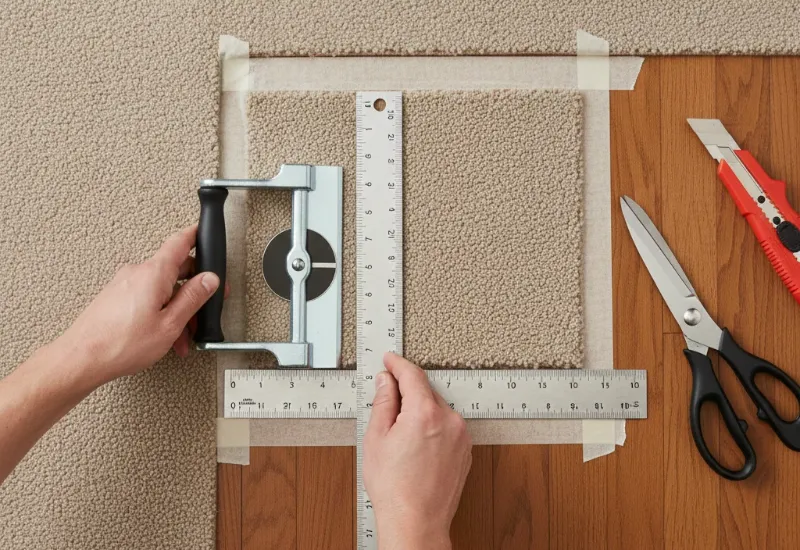
The first step of carpet patching is to assess the condition. Either the wall to wall carpet is completely damaged or has only minor scratches. If your carpet is completely worn off, there is no chance of repair. That needs to be replaced with new carpet. But in the case of staining and burnt marks, patching is possible. Thus, to begin, you need to draw a layout of the carpet and the damaged section. Further, plan the shape of the patch and note it down on paper to get the idea of the patching process. Measure the damaged section and note it down to add the same dimension patch at that place.
Clear The Surface
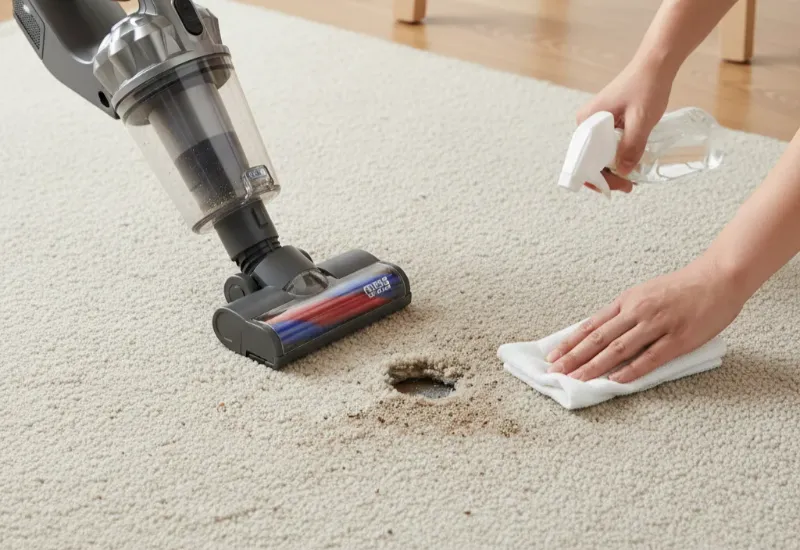
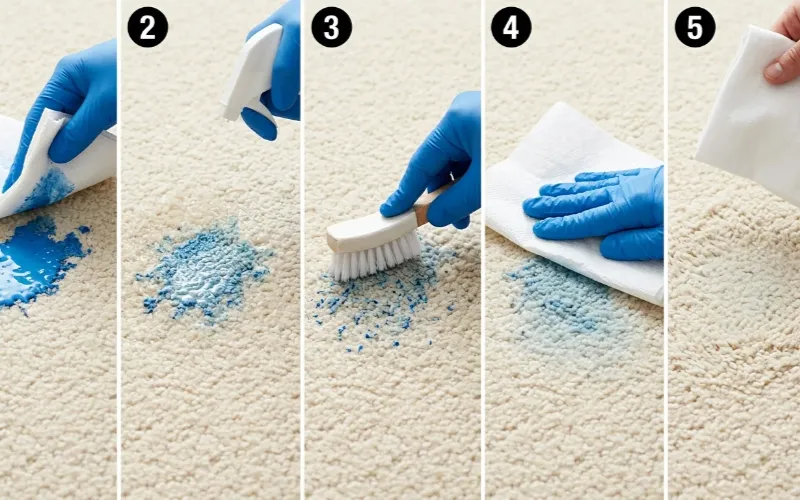
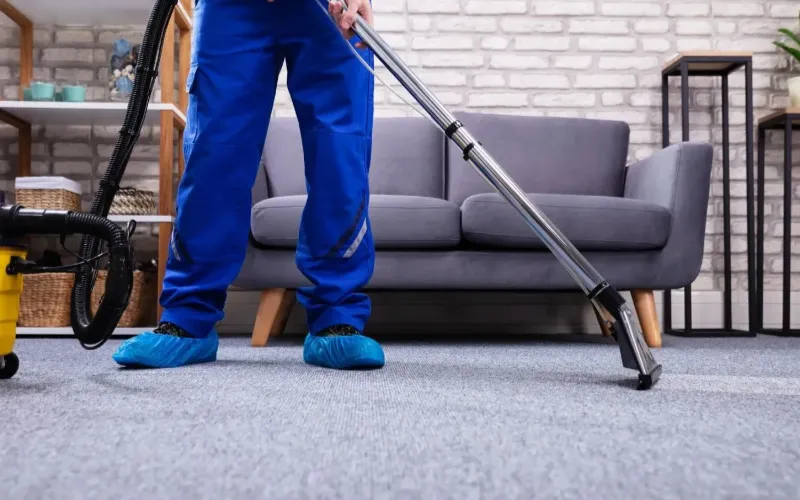
Right before placing the carpet patch, make sure to dust off the carpet surface. Ensure to eliminate dust and debris from the carpet. Besides, use a brush or vacuum cleaner to gather the debris. It is advised to use a HEPA-filtered vacuum cleaner to remove dust beneath the carpet as well. If your carpet is burned, then remove all charred material. Further, use a stain remover to remove any old stains on the carpet.
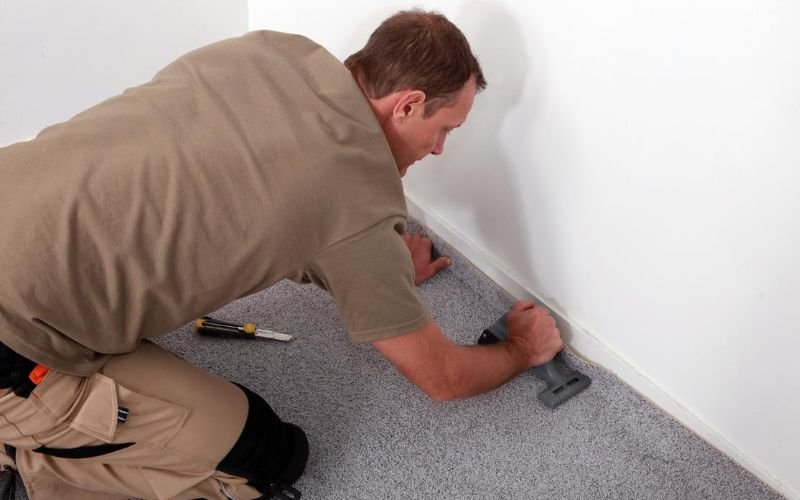
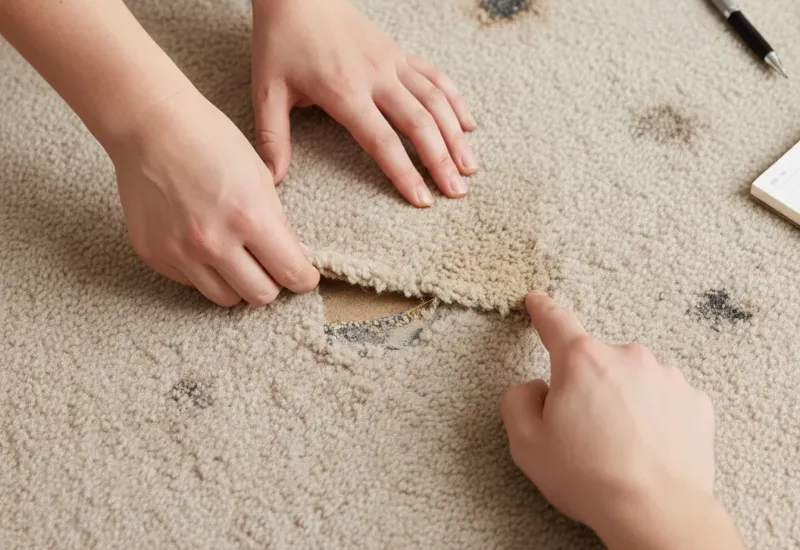
Trim The Affected Portion
It is necessary to remove the affected portion of the carpet. Take a marker and mark the spot on the carpet you want to remove. Further, take a carpet cutter and trim the carpet in that specific area. If you do not have a carpet cutter, use a sharp knife to cut that area. Also, cut the damaged carpet from the corners using a knife.
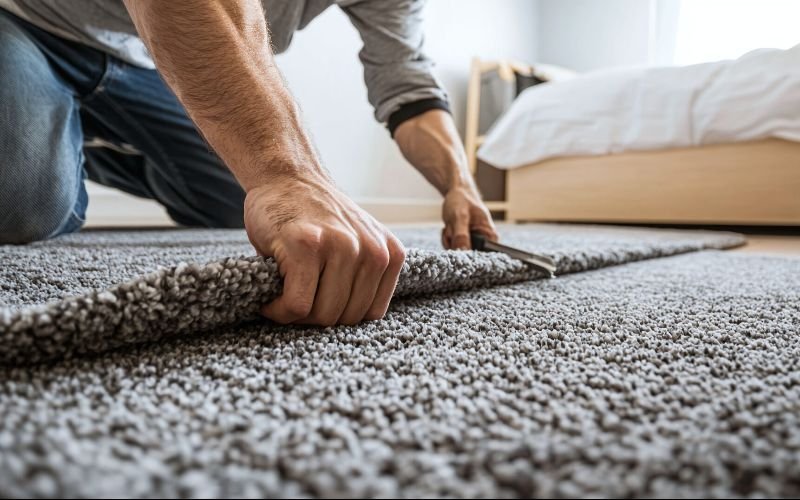
Craft A Carpet Patch
To add a carpet patch, you need the same color carpet. Besides, prefer to select the same print to add cohesion with the previous carpet. Further, if you cannot find the same pattern, cut a patch from the carpet below the furniture or closet. And add it over the damaged area. Moreover, if you cannot find any other options, choose a carpet that matches the existing carpet colors so that patching does not look mismatched.
Add-On Adhesive
Select a strong adhesive and apply it over the corners of the patch. Further, to apply the adhesive disk, first remove the back cover. After that, moisten the adhesive with water to stabilize the glue. Further, place your adhesive disk under carpet padding. Moreover, take at least 5-6 minutes to fix the glue. After that, move on to the next step.
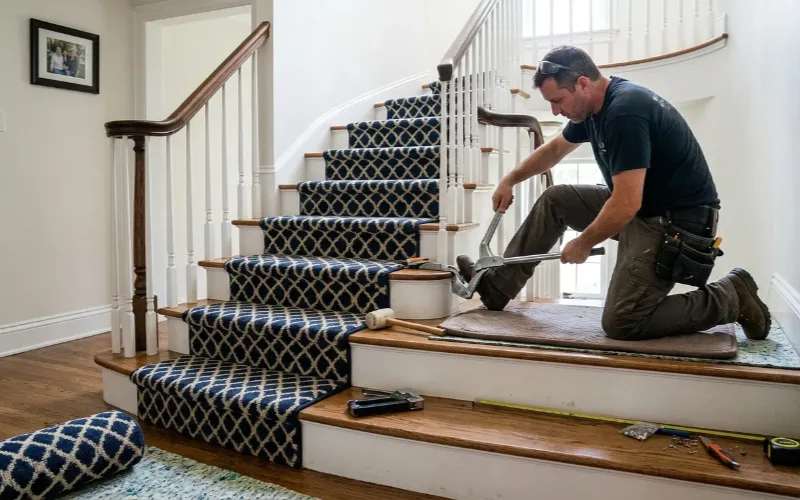
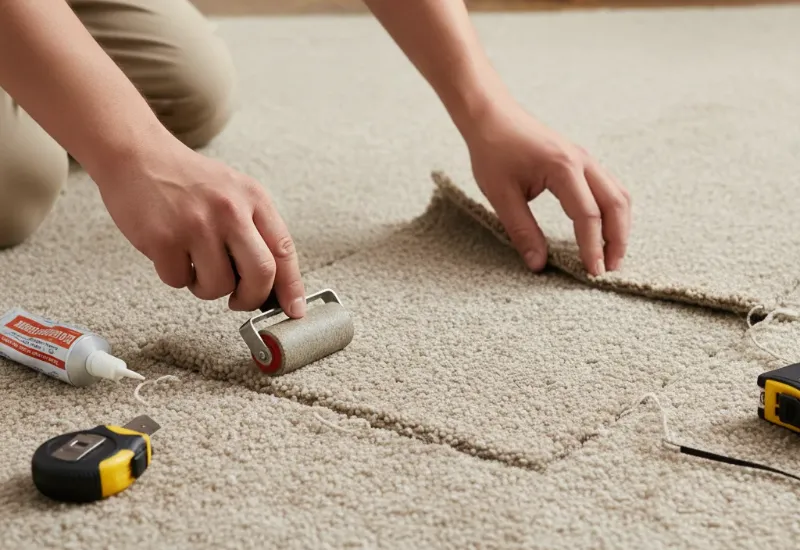
Securing the Patch
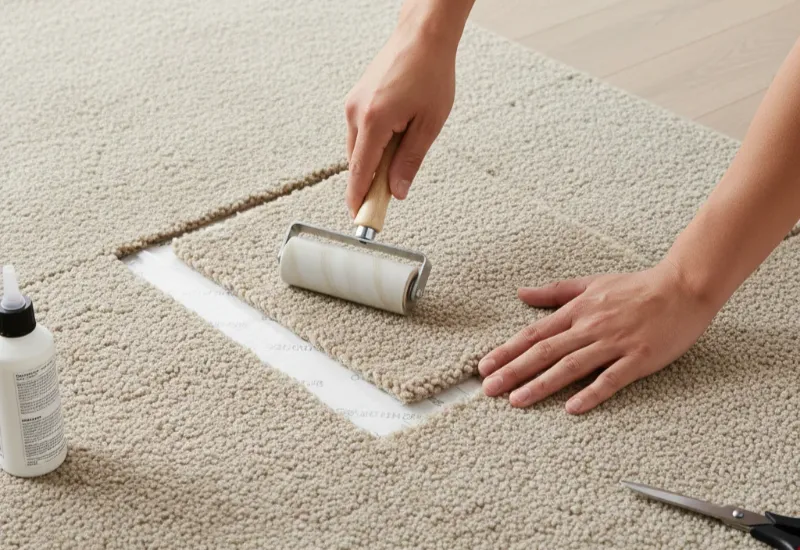
Right after placing the patch over the damaged section. Further, press the glue disc firmly to ensure a firm grip. Besides, add a carpet patch and press the corners. Moreover, release the air bubble by fixing the edges. Use a roller and add pressure over the attached patch. Thus, secure the carpet patch by utilizing all the above-mentioned tricks.
Make Proper Finishing
By utilizing a star roller to settle the corner of the carpet patch. Make sure to roll the carpet corners to perfectly seam the patch. Right after rolling down the carpet patch, ensure to cut the extra fiber around the corner. Proper finishing of the carpet is required to give it a pleasant look.
How To Avoid Carpet Damage?
It is better to take precautions to prevent future carpet-related damage. To do that, you must keep an eye on the preventive measures listed below.
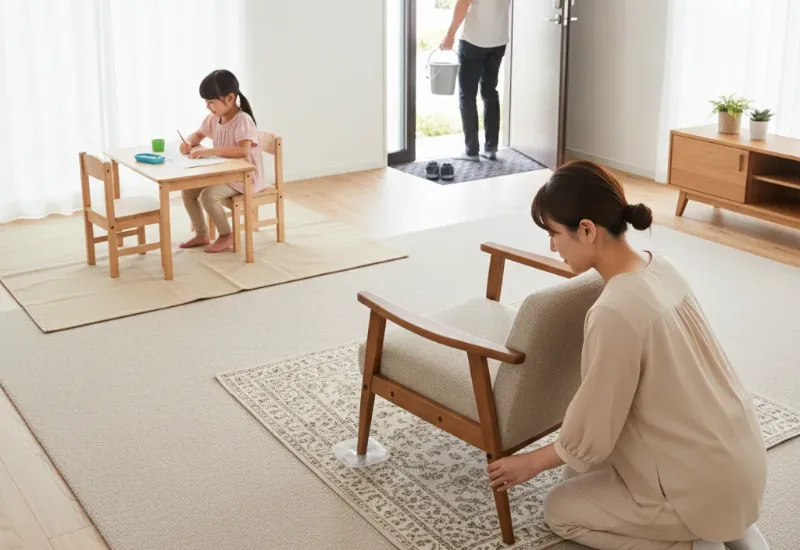
- You must change the side or furniture regularly. It can prevent marks and dents on the carpet. And you get a tidy surface.
- Try placing a doormat near the entrance of the home to keep excess dirt from entering. Entrance mats usually trap outside dust and debris, keeping your space clean and hygienic.
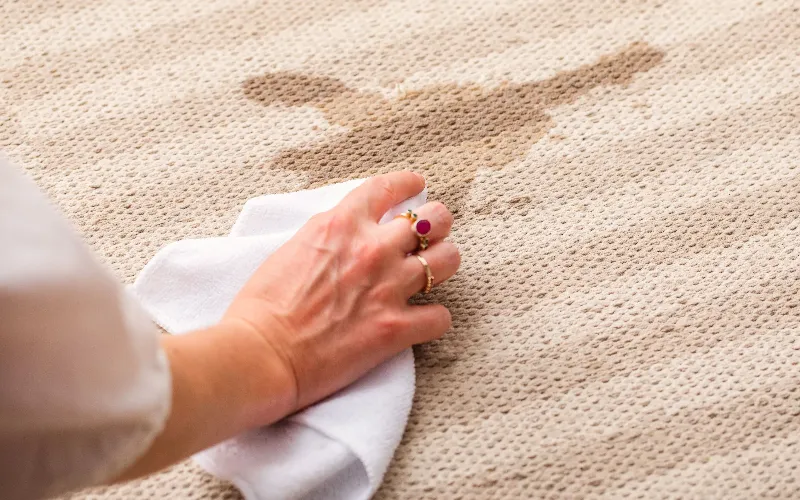
- You need to quickly blot any spill on the carpet. Spills can stain the floor and carpet and cause a bad smell, too.
- It is advised to sweep all the dirt from the floor with a broom. Besides, you can use a HEPA-filtered vacuum cleaner to collect dust from the carpet surface.
Wrapping Up
The best way to revive your carpet surface is to use the patching technique. This is done to avoid extra costs associated with purchasing new carpet. Further, minor repairs are cost-saving and add to in interior. Even though patching is a bit tricky procedure. But you can do it at home using this exclusive guide. First, clear out all the dust from the damaged area. Next, analyze the carpet’s condition to determine whether it needs minor repair or a full replacement. Further, measure the patch size and trim the required carpet patch in the same color and design.
Fix the patch using an adhesive disc and press it till the corner to avoid bubbling. Moreover, secure the patching with sealers and trim the excess material to achieve a finished look.